In this weekly series, associate editor Tim Chin and test cook Sasha Marx take you behind the scenes of Cook’s Science and give you a glimpse into our recipe development process, from how we come up with recipe ideas, to test kitchen failures, to discoveries we make along the way. This week, Tim takes us into the world of laminated dough.
The first time I tried to laminate dough—outside of pastry school—was kind of a disaster. It was my first experience using a sheeter—a giant piece of machinery used to roll out large batches of dough–instead of doing it by hand. I hadn’t sprinkled enough bench flour, so the dough stuck everywhere, and what was supposed to be a perfect rectangle looked more like an amorphous Rorschach test. One of the other cooks shook his head and muttered in my ear, “If you can’t learn to do this, you might as well pack up and leave.”
It was 4AM. I was three days into my stage (the equivalent of an unpaid internship in the cooking world) at one of the most famous pastry shops in Basel, Switzerland—and I was getting schooled on the finer points of laminated doughs.
In case you’re unfamiliar, lamination is the process of folding fat into dough to create dozens, if not hundreds, of paper thin layers (the fat keeps the delicate layers separate). From Napoleons to danishes to cinnamon-laced morning buns, lamination is the key to producing all those flaky, buttery pastries that line the windows of Parisian patisseries and your local bake shop. But perhaps the best known application of lamination is in croissants. At Cook’s Science, we go pretty crazy for beautiful, buttery pastries. And after flipping through some old cookbooks, I stumbled across several recipes for laminated brioche—think buttery, eggy brioche in place of the much leaner dough traditionally used for croissants. That got me thinking beyond croissants, danishes, and puff pastry: What else could I laminate? Milk bread? Sourdough? A Pineapple Bun? What are the limitations of the technique? What kinds of shapes could we try? Drawing on some experiences from my stage and from a stack of cookbooks that read like textbooks, I decided to get to work developing a laminated pastry that our team could call our own.
Before getting into the kitchen I wanted to break down how lamination really works. In classical French baking, any lamination begins with a smooth, elastic dough—the détrempe—that will be rolled and wrapped around the butter. This dough can be as simple as flour, water, and salt; or it can be leavened with yeast, or even enriched with butter, eggs, and milk. The degree of leavening and enrichment will dictate the finished texture and flavor of whatever pastry you’re making.
After mixing and resting, the dough is rolled out and a thin sheet of butter is placed on top. The dough is folded to enclose the butter and then rolled out into a thin sheet, which is then folded like a letter. This process, known as tourage, is then repeated to generate layers in exponential fashion. (And yes, you can laminate with pretty much any fat. I’ve seen black garlic butter, beef fat, even foie gras.) In order to keep up with demand, most bakeries use sheeters that can roll out large quantities of dough to exact thickness. Depending on the number of folds you do, you can produce drastically different levels of layering. For example, 3 sets of tri-folds (or letter folds) gives 27 layers, while 4 sets of tri-folds gives 81 layers. 5 sets gives 243 layers, and 6 gives 729 layers.
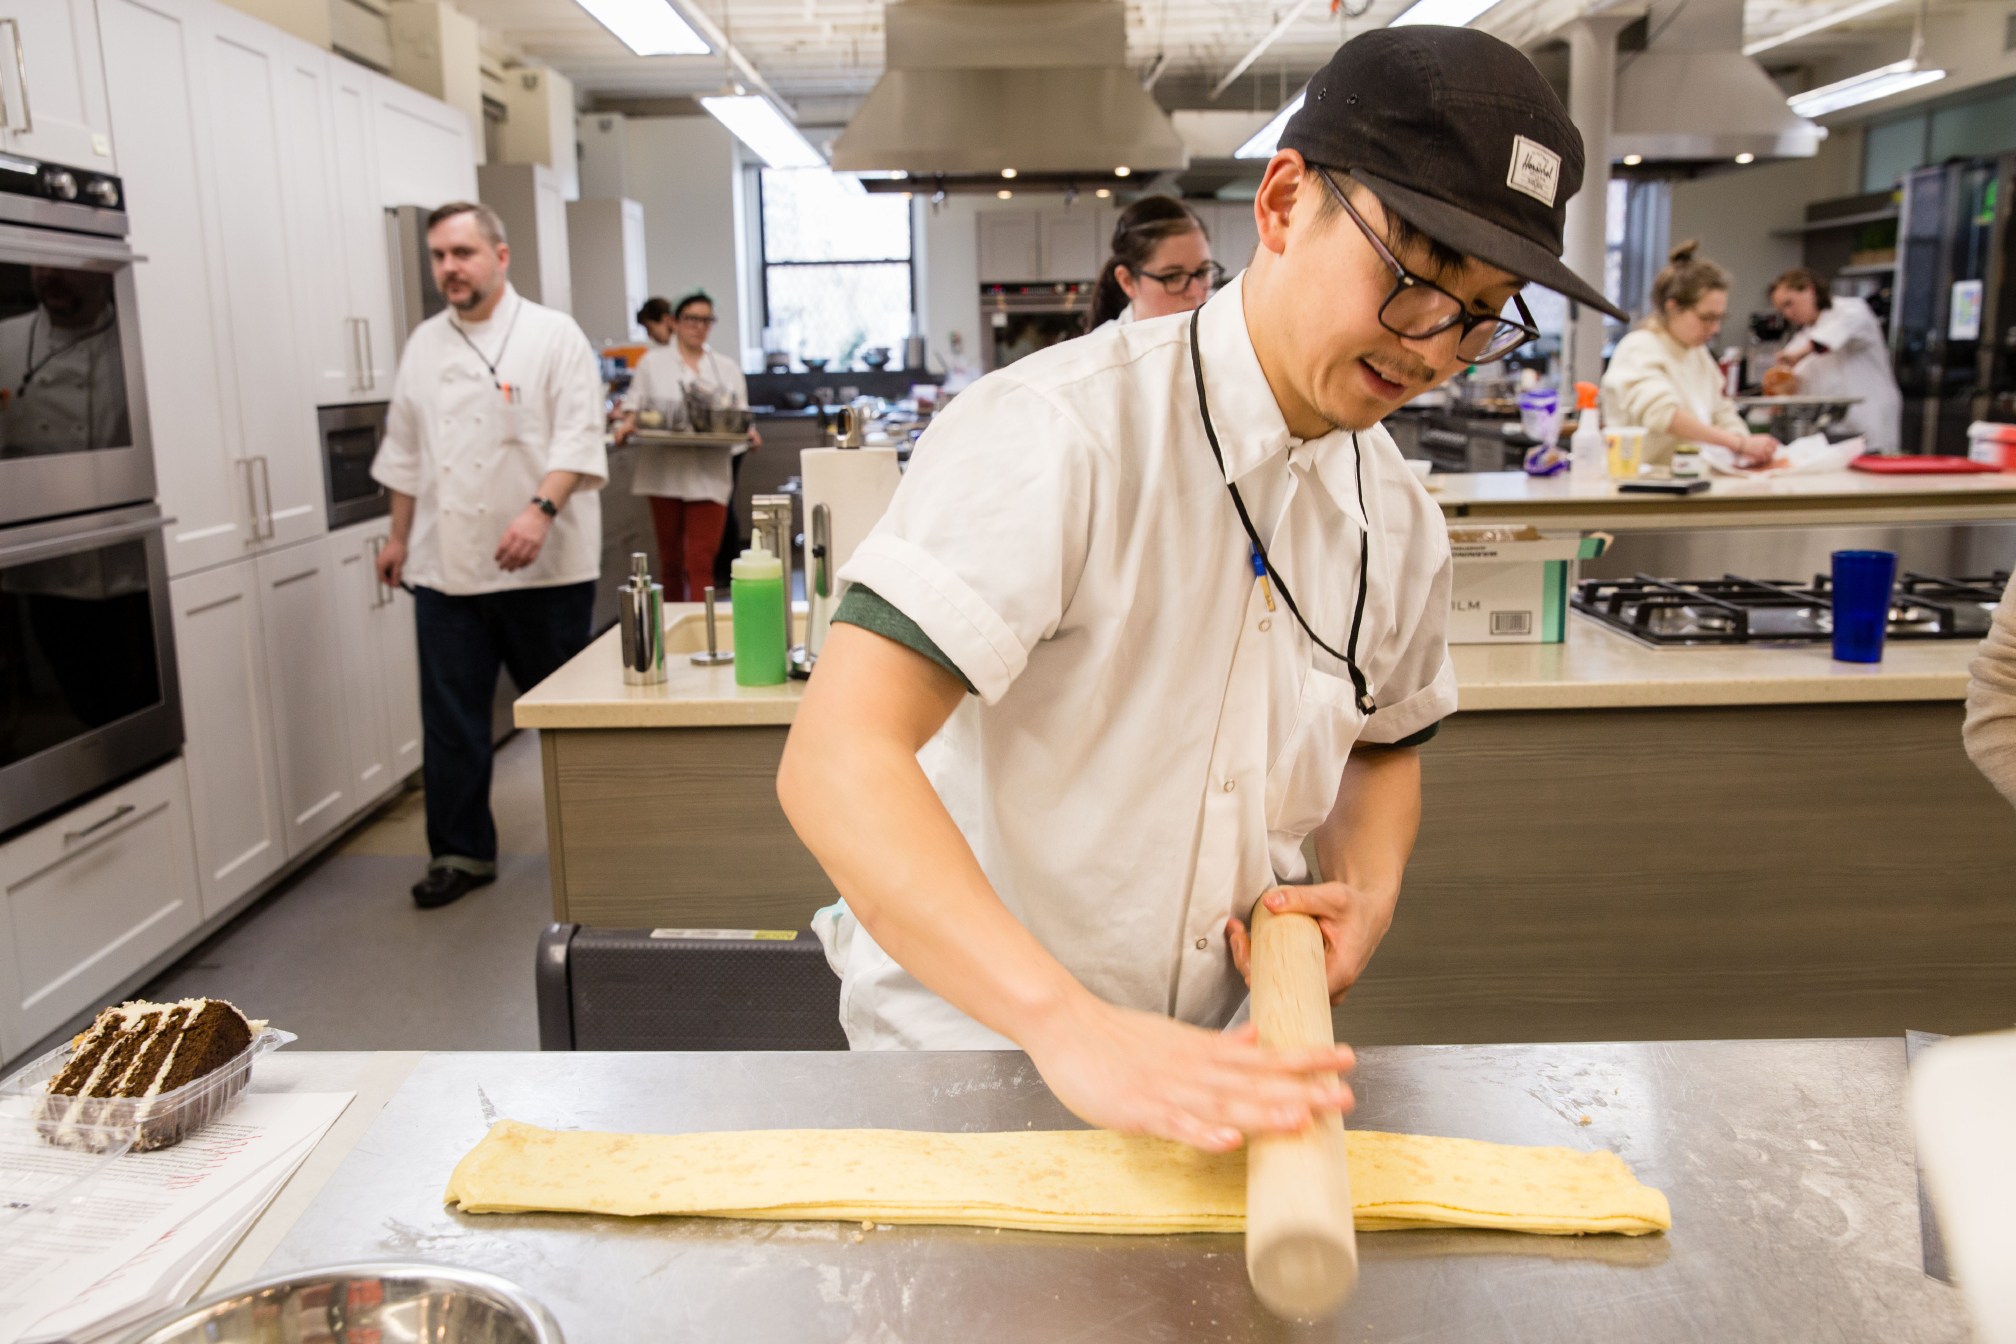
As you might imagine, there are many factors affecting successful lamination—dough temperature, butter temperature, resting time, rolling technique. But with a little care and patience during the process, the payoff is a unique lightness and airiness that results from the thin sheets of butter steaming in the oven and puffing the dough. In the case of yeasted laminated doughs, the payoff is even greater: Leavening with yeast results in an even airier crumb, with small, irregular pockets or “alveoli”—as François Payard puts it.
For my laminated bread, I’ve been working toward something between a croissant and brioche. I love the richness and fluffiness of traditional brioche, but I find it a little dense and overly rich. On the other hand, I find most croissants too tough and bready. So I’m working with a moderately enriched dough—similar to Japanese milk bread—with more milk, sugar, and eggs than a traditional croissant dough, but with less eggs and butter than a traditional brioche. In my opinion, like the baby bear’s breakfast pastry, it’s just right.
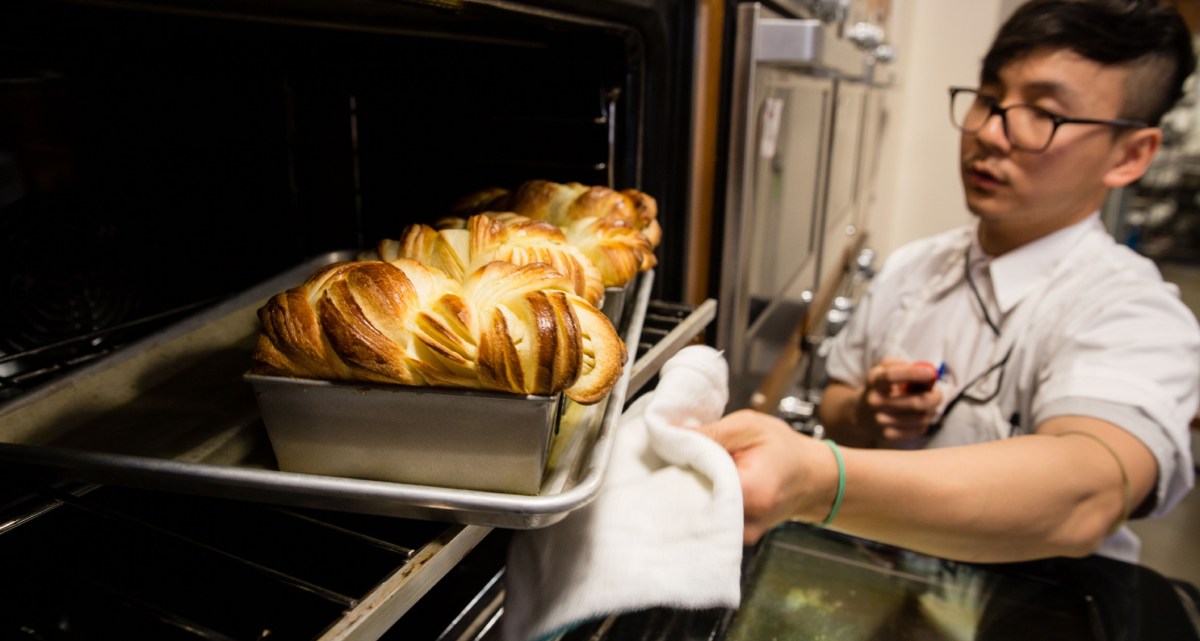
My first tests had mixed results. I started by shaping the laminated dough into a braided loaf (kind of like challah). It baked up beautiful on the outside, with clearly visible layers peeking out—a sure sign of proper lamination. But when I sliced into the loaf, the crumb was denser than I’d hoped. I suspected the problem was in proofing: I wasn’t allowing enough space in the loaf pan for the dough to rise properly, resulting in layers pressing against each other. I scaled down the amount of dough for the pan, and the crumb was better, but I think I need to re-evaluate the shape of the loaf itself—maybe consider just a straight roll to give a better cross-section when you cut into the loaf. After a recent team tasting and discussion, I think I’ll be looking into two different shapes. The large sandwich loaf basically eats and slices like a giant, richer croissant with a beautiful crumb that would be perfect for grilled cheese or French toast. The other shape we’re considering is a pull-apart monkey bread shape—something we could spoon a little cheesy sauce over. Sasha’s pushing hard for this shape, most likely in a bid to win the hearts of brunch fanatics everywhere.
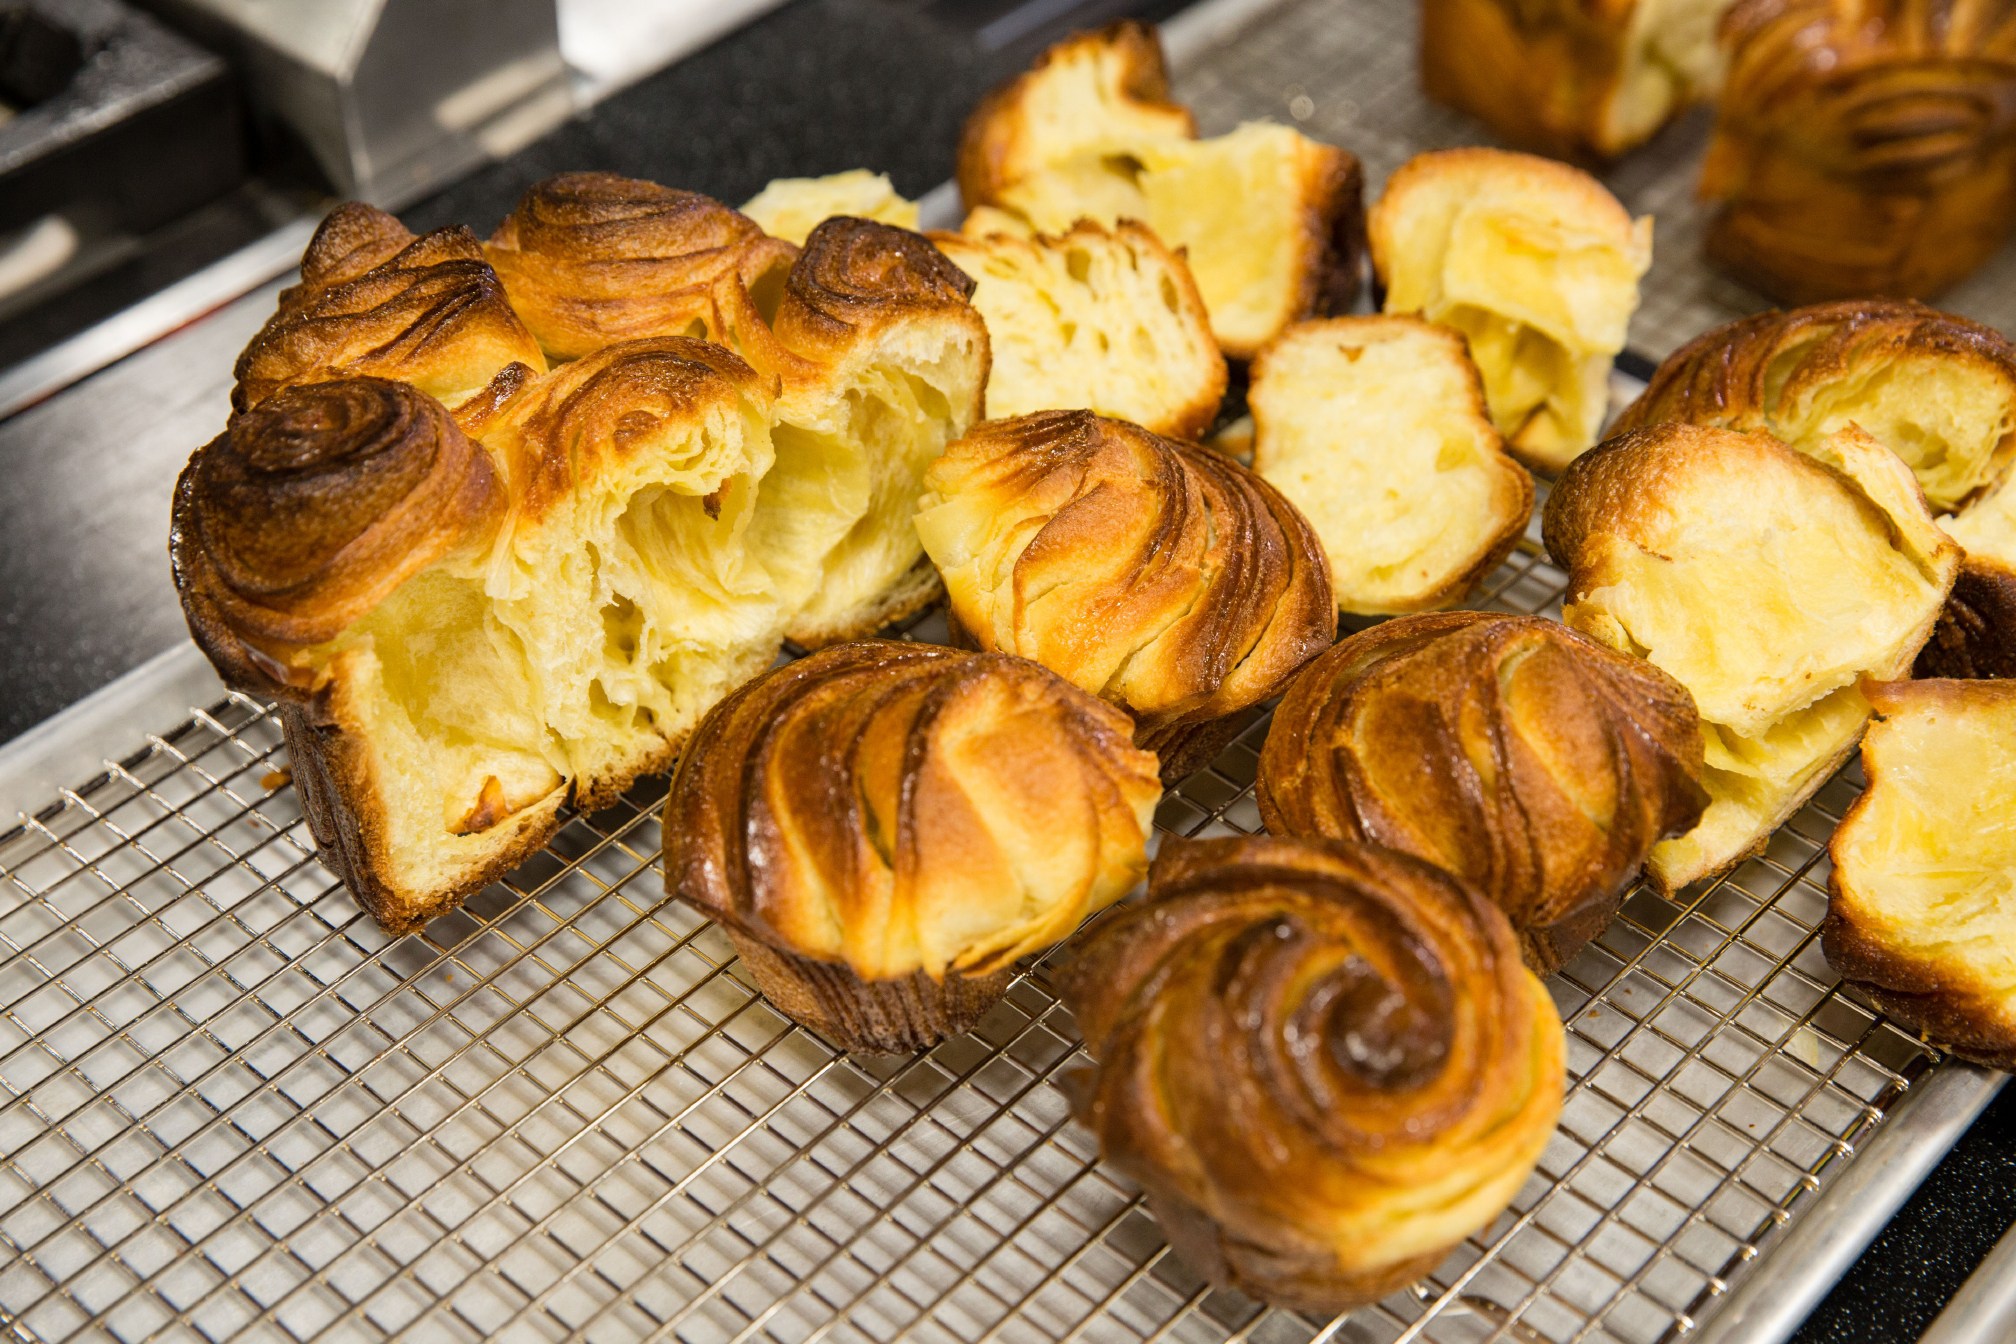
As for the lamination itself, since I’m working with a leavened dough, I’m finding that I don’t need any more than 27 layers to produce even layering and a light, open crumb—thanks to the extra lift from the yeast.
I’m still working the kinks out of this project. Getting the plasticity of the butter and dough to equalize is a big challenge. And of course, streamlining the recipe for the home cook is the greatest challenge—deciding where I can save time, where I can make things easier in a process that can take up to 3 days from start to finish. Hopefully I’ll have something good within the next week. Whatever I come up with, I hope it does justice to all the beautiful work those cooks are doing in Basel. (And I’ll be sure to keep my rectangles straight this time.) For now, my butter consumption is going to stay a little on the high side.
Do you have any experience with lamination? Any tips for success? Drop a line in the comments below.
Photography by Steve Klise.