In this weekly series, Associate Editor Tim Chin and Test Cook Sasha Marx take you behind the scenes of Cook’s Science and give you a glimpse into our recipe development process, from how we come up with recipe ideas, to test kitchen failures, to discoveries we make along the way. This week, Tim talks about what it takes to make our recipes look their best in photographs.
Before I started working at America’s Test Kitchen, I never really gave too much thought to all the people who work to make food photos look so great, whether they’re on websites or in print magazines or cookbooks. Food stylists, art directors, and photographers are an integral (and very talented) part of our team here at ATK. Without them, we’d have to subject you to shoddy, over-exposed iPhone photography all over the Cook’s Science website. And no one wants to see that.
For most teams at ATK—from cookbooks to Cook’s Illustrated to Cook’s Country—whenever a recipe is developed, it’s handed off to the “Photo Team”: a dedicated team of cooks who meticulously prep and cook the recipes for photo shoots, making sure they look exactly as the recipe intended. But because Cook’s Science is the newest kid on the ATK block, and our web-only platform and weekly publication schedule means working on fast-paced deadlines, our photo shoot process isn’t quite the same. Since we started Cook’s Science last July, Sasha, Dan, and I have been involved with photo shoots for more than 72 recipes—resulting in thousands of photographs. Our role during photo shoots is mainly to cook the recipes we develop. Then, the food stylists make them look their absolute best, the art directors set the vision, style, and direction for the shots, and the photographers work their magic with angles and lighting. (Though, sometimes, Sasha, Dan, and I get to try our hands at food styling as well.)
In my experience, cooking for a photo shoot is not that unlike cooking on the line at a restaurant. The same mantra applies: Make it nice, or make it twice—or three times if you’re having a bad day. Standard operating procedure has us prep two versions of whatever we’re making for a shoot. In truth—and even though it takes a significant amount of our time—cooking for our own photo shoots is mostly a blessing. By the time one of my recipes is ready for its closeup, I will have cooked some version of that dish upwards of 20 to 30 times. I know the recipe inside out, and I know exactly how it should look and feel. I don’t have to rely on someone else to execute my ideas, and if anything goes wrong, I know how to fix it. Prepping your own recipes for a shoot can feel like a lot of responsibility, but, for me, I rest easier knowing that I’m doing things right. Plus, I kind of thrive on that pressure to execute.
Once I finish cooking a recipe for a shoot, it’s usually handed off to one of our food stylists. Contrary to what you might have heard about what happens during commercial food photo shoots, food styling for Cook’s Science doesn’t involve a lot of fake food, cosmetic additives, or painstakingly gluing sesame seeds on buns. We prefer to photograph things as they should look—unadulterated and natural; what we hope it will look like when you, the reader, cook it at home. When we do use additives, we do so with discretion, and usually so that we can extend the “freshness” of a dish during a longer photo shoot, saving time and minimizing waste. For instance, during the shoot for my hand-pulled noodle recipe, we tossed the cooked noodles in a wet, shiny xanthan gum slurry to keep them lubricated and fresh-looking throughout the hours-long photo session. But by and large, if we cook it properly, the food doesn’t need much help in order to look pretty fantastic. Our food stylists instead concentrate on how the food is arranged on the plate, height, perspective, and whether or not the composition shows all the proper elements of a finished dish.
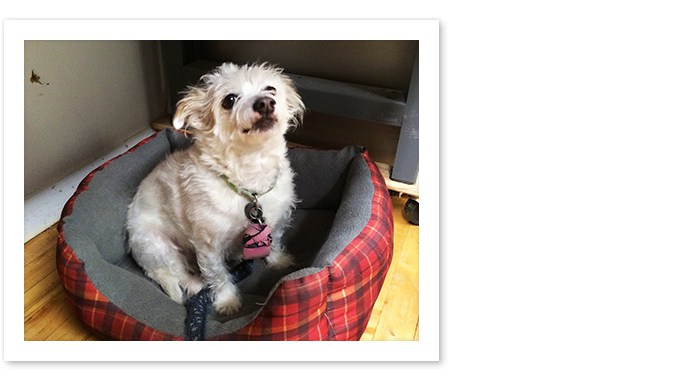
I recently had a conversation with Marie Piraino, one of our food stylists and a fellow dog-lover (see photo below). She’s been in the food styling game for years, and we were reflecting on the 60-Minute Birthday Cake recipe we were shooting. She was reminiscing about the good (bad?) old days of food styling, when aesthetic perfection was the gold standard: The individual berries on a cake had to be exactly the same size, the cake had to be perfectly sliced, the frosting had to be smooth and seamless from edge to edge. She was over it. “That’s all out of fashion now,” she said. And, to be sure, my cakes for the shoot weren’t perfect in that conventional sense. The frosting wasn’t completely matte and smooth from end to end, the berries were different sizes, and the cocoa powder dusted on top was irregularly patterned. But Marie added, “I couldn’t have done a better job. The way you did it—it’s perfect. I wouldn’t change much.”
In Japan, there is a term in aesthetics derived from Buddhism called wabi-sabi. The idea is centered around the acceptance of transience, impermanence, and imperfection. In art and design, this aesthetic features roughness, asymmetry, and an overall simplicity that belies the integrity of nature. Sasha and I throw this term around a lot when talking about food, plating, and styling—often in the context of our photo shoots. In the modern restaurant kitchen, it’s no longer cool to spoon push some sauce on a plate, tweezer the hell out of microgreens so they’re just so, or quenelle three kinds of sorbet for a single dessert. Don’t get me wrong, those techniques and ideas have a place and time in the kitchen. But instead, we now celebrate imperfection in presentation. And that I can get behind.
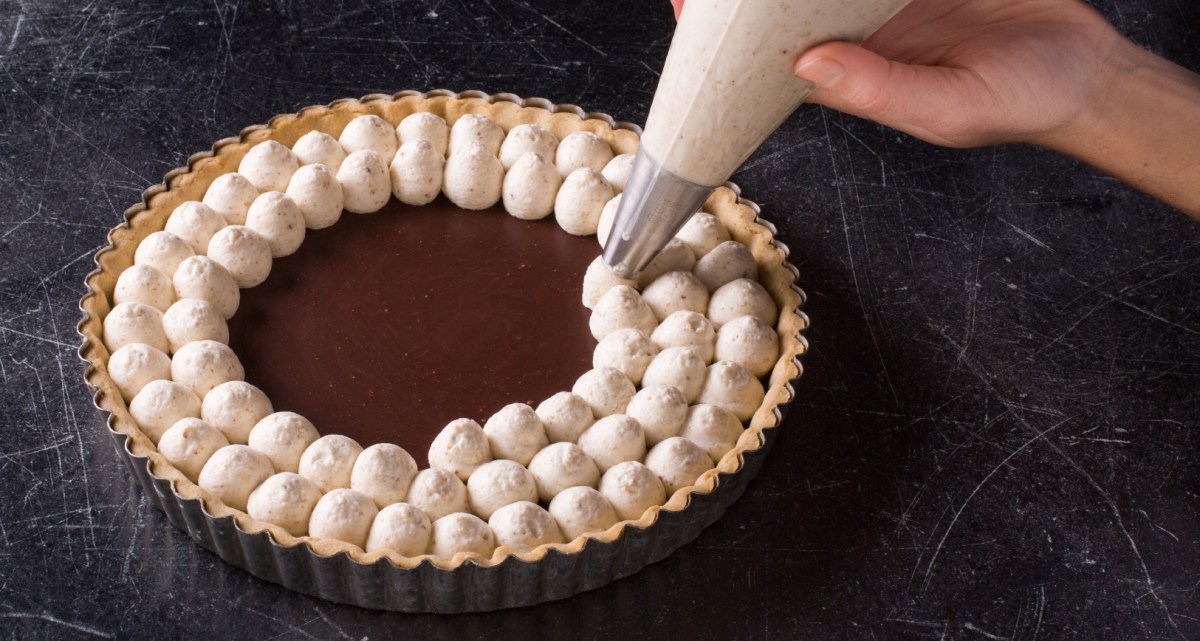
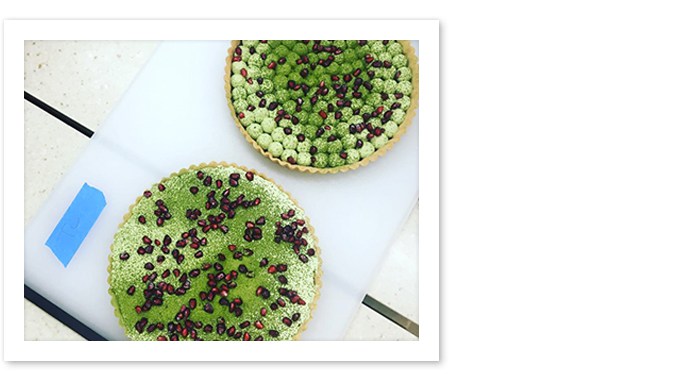
Months ago, Sasha and I were playing around with different presentations for the Chocolate, Matcha, and Pomegranate Tart. Sasha dubbed it a “culinary Myers-Briggs test”. To finish my tart, I meticulously piped balls of cream in concentric rings over the chocolate, and dusted matcha powder over the top with reckless abandon. Sasha opted for a more laid-back approach—quickly spreading the cream in one (pretty even) layer before dusting it with matcha. Who did it better? Who’s to say. I think they both looked great. And neither of our tarts were perfect.
But I guess that’s the point: Perfectly imperfect.
What are your thoughts on the food photography and styling you see on websites and in print? Tell us in the comments.
Styled Food Photography by Steve Klise and Daniel J. van Ackere