Recipe

Cultured Butter

by Paul Adams

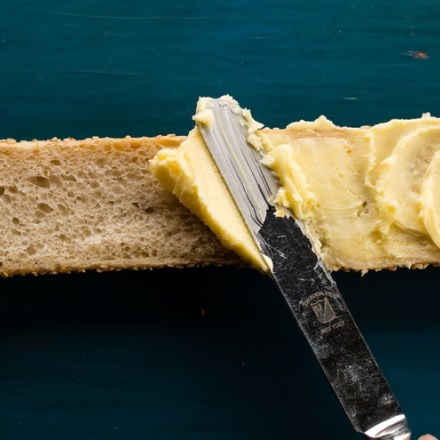
With the help of friendly bacteria, you can make rich, tangy homemade butter that’s a lot more interesting than the store-bought sticks. All it takes is cream, a little starter culture, and time. If you live in pasture country and can get fresh, grass-fed cream straight from a nearby farm, you’re in great shape. (Note that there are dangers associated with unpasteurized milk, especially for immunocompromised people.) High-quality, flavorful cream makes the best butter, no question, even without culturing it.

We highly suggest you seek out some of the good stuff for this recipe. But if you don’t have a cow, don’t have a cow! Regular supermarket heavy cream is much improved when you patiently culture it. In our testing, we tried both pasteurized and ultrapasteurized heavy cream, which are treated differently before packaging. We also tested a cream that contained ingredients intended to make it stay foamed longer when it’s whipped. The best batches were made with pasteurized (rather than ultrapasteurized) cream free of stabilizers.

The most exciting results, the ones that were truly distinctive and unlike butters you can buy, came from letting the culturing process continue a full week. The flavors that developed were strong and complex, bordering on funky and cheesy.

Last but definitely not least, when you make cultured butter, you get buttermilk! Plenty of it, with the same nuanced tang as the butter—perfect for making biscuits or marinades or even for drinking as a refreshing fermented treat. Diane St. Clair, whose butter farm I visited, wrote a whole book about cooking with buttermilk. Just be sure to save a couple of tablespoons of it to culture your next batch of butter. 

Yield
About 2 cups (325 grams) butter; about 2 cups (450 grams) buttermilk
Ingredients
940 g heavy cream
30 g buttermilk
1.5 g salt (optional)
1 quart heavy cream
2 tablespoons buttermilk
¼ teaspoon salt (optional)
Essential Equipment
Instructions
    • 940 g heavy cream 
    • 30 g buttermilk
    Combine cream and buttermilk in clean lidded container. Cover container or close carton and let sit at room temperature until mixture smells tangy and buttery and has a thick consistency, at least 24 hours or—our recommendation—up to 7 days. 
  1. Chill cream to 55 to 60 degrees F/10 to 15.5 degrees C. 
  2. Transfer cream to food processor and process until mixture turns from grainy whipped cream to lumps of butter splashing in liquid, 1 to 3 minutes. Stop processor immediately.  
  3. Fill medium bowl halfway with ice and water. Line fine-mesh strainer with triple layer of cheesecloth, leaving few inches of cloth hanging over sides of strainer. Pour butter mixture through cheesecloth-lined strainer into large bowl (buttermilk will collect in bowl). Lift cheesecloth by edges and twist and squeeze tightly over strainer to press out more buttermilk (when butter starts to squeeze through cheesecloth, you are done). Transfer cheesecloth-wrapped butter to ice bath until firm around exterior, about 2 minutes. Transfer buttermilk to airtight container; do not wash bowl. 
    • 1.5 g salt (optional)
    Remove butter from cheesecloth and transfer to now-empty bowl. Stir and press with wooden spoon to force out additional buttermilk from butter, 1 to 2 minutes. Drain this buttermilk from bowl, add to buttermilk container, and refrigerate until ready to use. If making salted butter, knead salt into butter with wooden spoon. Transfer butter to separate airtight container and refrigerate until ready to use. (Butter can be refrigerated for up to 2 months.) 
Instructions
    • 1 quart heavy cream 
    • 2 tablespoons buttermilk
    Combine cream and buttermilk in clean lidded container. Cover container or close carton and let sit at room temperature until mixture smells tangy and buttery and has a thick consistency, at least 24 hours or—our recommendation—up to 7 days. 
  1. Chill cream to 55 to 60 degrees F/10 to 15.5 degrees C. 
  2. Transfer cream to food processor and process until mixture turns from grainy whipped cream to lumps of butter splashing in liquid, 1 to 3 minutes. Stop processor immediately.  
  3. Fill medium bowl halfway with ice and water. Line fine-mesh strainer with triple layer of cheesecloth, leaving few inches of cloth hanging over sides of strainer. Pour butter mixture through cheesecloth-lined strainer into large bowl (buttermilk will collect in bowl). Lift cheesecloth by edges and twist and squeeze tightly over strainer to press out more buttermilk (when butter starts to squeeze through cheesecloth, you are done). Transfer cheesecloth-wrapped butter to ice bath until firm around exterior, about 2 minutes. Transfer buttermilk to airtight container; do not wash bowl. 
    • ¼ teaspoon salt (optional) 
    Remove butter from cheesecloth and transfer to now-empty bowl. Stir and press with wooden spoon to force out additional buttermilk from butter, 1 to 2 minutes. Drain this buttermilk from bowl, add to buttermilk container, and refrigerate until ready to use. If making salted butter, knead salt into butter with wooden spoon. Transfer butter to separate airtight container and refrigerate until ready to use. (Butter can be refrigerated for up to 2 months.) 
Close

Cook’s Science Newsletter

Sign up for our newsletter and be the first to learn about new stories, get behind-the-scenes looks at our research and testing, and score exclusive recipes.

Welcome to the community!

Keep an eye on your inbox for the sauce recipes and for our regular newsletter. Thanks for joining us!