Ingredients
| 450 g | kosher salt |
| 450 g | sugar |
| 660 g | eggs (12 large eggs) |
| 1 pound kosher salt |
| 1 pound sugar |
| 12 large eggs |
Essential Equipment
Instructions
- 450 g kosher salt
- 450 g sugar
- 660 g eggs (12 large eggs)
- Adjust oven rack to middle position and heat oven to 200 degrees F/93 degrees C. Set wire rack in rimmed baking sheet. Fill medium bowl with cool water. Remove yolks from salt mixture, brushing off excess, and rinse gently in water. Pat yolks dry with paper towels and transfer to wire rack. Transfer sheet to oven and bake until exteriors of yolks are dry to touch, 30 to 40 minutes.
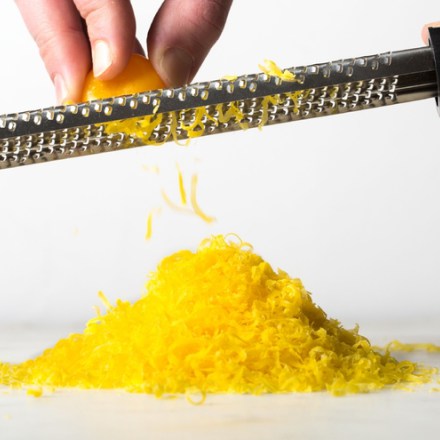
- Grate or thinly slice yolks and sprinkle on your favorite dishes, from pasta and risotto to roasted vegetables and buttered toast. (Cured yolks can be refrigerated in airtight container for up to 2 weeks.)
Instructions
- 1 pound kosher salt
- 1 pound sugar
- 12 large eggs
- Adjust oven rack to middle position and heat oven to 200 degrees F/93 degrees C. Set wire rack in rimmed baking sheet. Fill medium bowl with cool water. Remove yolks from salt mixture, brushing off excess, and rinse gently in water. Pat yolks dry with paper towels and transfer to wire rack. Transfer sheet to oven and bake until exteriors of yolks are dry to touch, 30 to 40 minutes.
- Grate or thinly slice yolks and sprinkle on your favorite dishes, from pasta and risotto to roasted vegetables and buttered toast. (Cured yolks can be refrigerated in airtight container for up to 2 weeks.)